
I’ve heard countless parents say, “I refuse to be a short-order cook.” Currently, with eight or nine mouths to feed, I don’t have the time to be a short-order cook either. It’s also almost impossible to fix something that everyone wants to eat. And also, because we have kids with trauma and food insecurities, we can’t say, “Eat it or go hungry.” And also, you can’t make your kids eat even though we know they need to.
So what’s a parent to do?
We rely a lot on modular or deconstructed meals. These provide healthy options for everyone that they have control over and can make into something even the pickiest eaters will want to eat. Here are four ideas of simple meals that will make even your picky eaters happy.
Tacos or Nachos
I provide tortillas, taco shells, scoop chips, and rice or lettuce as a base. For toppings, I set out shredded cheese, sour cream, cooked ground meat, black beans, avocado, and salsa. I also try to have bacon pieces on hand because bacon makes everything better
From here the possibilities are endless. They can make a rice bowl, salad, traditional hard or soft tacos, or nachos. Even if they only pile on only one ingredient, they won’t die.
Baked Potato Bar
I provide baked Yukon gold and sweet potatoes. For toppings, I set out butter, caramelized onions, chopped avocado, broccoli, shredded cheese, sour cream, bacon pieces, and leftover chili (if I have it).
Again, even if there’s only one ingredient your pickiest eater will eat, they won’t die.
Omelets
This one is a bit more time-consuming, but a family favorite. I try to chop all the fillings and take orders before I start cooking. A good quality, truly non-stick pan will make this dinner less frustrating as well. Another hint is to add a tablespoon of water for each egg you’re scrambling for extra fluffy eggs.
Our favorite fillings are caramelized onions, green peppers, bacon, mushroom, broccoli, spinach, salsa, and cheese.
If your kid only eats an egg with cheese or only eats a handful of toppings sans egg, it will be okay.
[bctt tweet=”If your kid only eats an egg with cheese or only eats a handful of toppings sans egg, it will be okay.” username=”corkboardblog”]
Stir Fry or Fried Rice
I provide rice and lo mein or glass noodles, sauce, stir-fried veggies, and a meat or two. If you’re feeling fancy, throw in a chopped Asian salad kit.
The kids fix themselves the parts they like and leave the parts they don’t.
If you have a deconstructed meal idea, join our free community to share your idea.
]]>I love this recipe because it’s healthy, cleans out your produce drawer, and it’s super-easy. Plus it’s sugar-free which makes it a great fit for those sticking with Paleo or Keto diets.
[bctt tweet=”I love this spaghetti sauce recipe because it’s healthy, cleans out your produce drawer, and it’s super-easy.” username=”corkboardblog”]
I used my Instant Pot which definitely makes it quicker, but I imagine you could also use a big pot on the stove or your slow cooker.
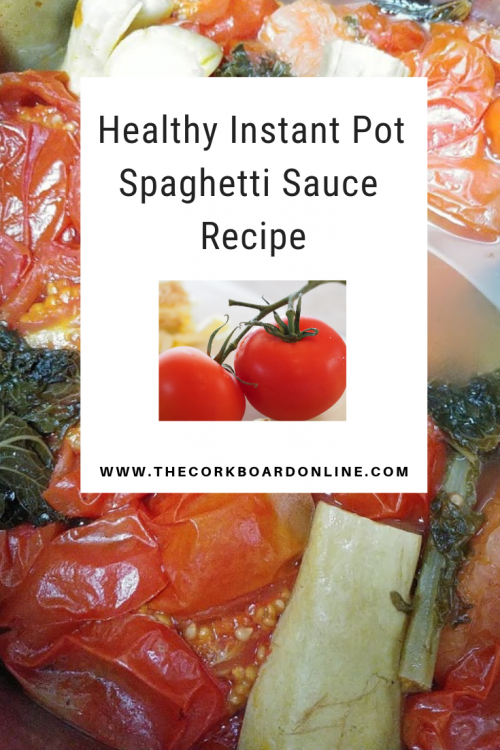
Ingredients
Lots of tomatoes
Onion
Carrots
Squash
Kale
Garlic
1 Cup Liquid
Salt
Italian herbs in some form–fresh, dried, essential oils.
What to do
- Fill your Instant Pot almost to the fill line with tomatoes. I cut mine in half before tossing them in.
- Add a peeled onion, a couple carrots, a cubed squash, a couple large leaves of kale, and a clove of garlic.
(The beauty is that there is minimal chopping. Large chunks are actually better for Step 6.) - Add liquid. I like to use homebrewed kombucha, but plain water would work.
- Salt and herb to taste. I like lots of fresh basil and oregano.
- Cook on high pressure for 20 minutes. Release pressure naturally or manually.
- Don’t skip this step. Use a ladle to scoop out most of the excess liquid. Save the veggie stock for soups and recipes. It’s what makes this sauce thick and rich and stick to your pasta.
- Use an immersion blender to puree the sauce. Alternatively, you can bath puree it in a blender.
- After it’s cool, freeze in thick freezer safe bags or canning jars.
- Repeat every time your counter is covered in tomatoes!
- Enjoy the fresh taste of summer all winter!
If you skip the Italian herbs, this recipe also makes a great base for chili. You can always add the herbs later if you decide to use it in an Italian recipe.
We use this on pasta, zucchini noodles, in recipes, and as tomato soup.
What’s your favorite recipe that uses spaghetti sauce?
]]>Our cucumber plants are producing like crazy this year. We’re slicing and dipping, making Korean cucumber salad, giving them away, and, my favorite, pickling them.
I love this recipe because you don’t need any special canning equipment. It’s super easy and makes crunchy pickles. Everyone tells me they are the best pickles they’ve ever had.
[bctt tweet=”I love this recipe because you don’t need any special canning equipment. It’s super easy and makes crunchy pickles. #recipe” username=”corkboardblog”]
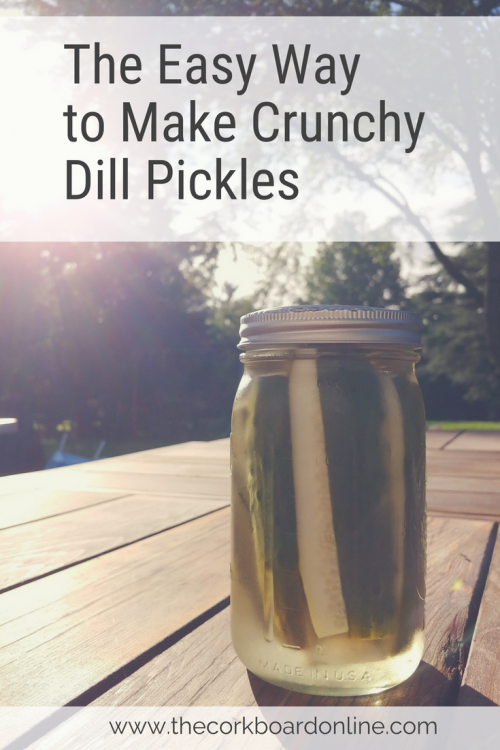
The Cucumbers
Ideally, you’d use pickling cucumbers. We just picked up seedlings this year from our local farm stand with no idea what variety we planted. The bad news is that they are not picklers. The good news is that if you pick them when they’re smaller, they still work like a charm.
If you don’t have a garden, hit up a local farmer’s market for some pickling or smaller cucumbers. I think the English or Japanese cucumbers would also work because of their smaller seeds.
Before you start pickling, the cucumbers need to be SUPER cold. This is actually one of the secrets to super crunchy pickles. If they’re not already refrigerated, you can stick them in an ice bath in a big cooler for at least an hour. The ice bath will actually make them colder than your refrigerator and possibly more crunchy in the end.
[bctt tweet=”Before you start pickling, the cucumbers need to be SUPER cold. This is actually one of the secrets to super crunchy pickles.” username=”corkboardblog”]
The Ingredients
8 pounds of cucumbers
4 cups white vinegar
12 cups water
2/3 cup pickling salt (has no iodine)
16 cloves of garlic (peeled and halved)
8 sprigs of fresh dill (the feathery part)
8 heads of fresh dill (the flower)
If you don’t have dill heads (I only see sprigs at the store), you can sub a drop of Dill Essential Oil or extra sprigs.
The Equipment
8 wide-mouth, quart-size canning jar
(Although, any glass jar with a lid will do in a pinch)
Large pot
Ladle
The How
- Get your cucumbers nice and cold (see above).
- Sterilize jars and lids by running through the dishwasher.
- Drop 2 halves of garlic and a dill head (or a couple sprigs) into the bottom of each jar.
- Pack each jar with cucumber spears or slices. Leave at least a half inch headroom at the top of the jar.
- Top each jar with 2 more halves of garlic and dill sprigs.
- In a large pot, combine vinegar, water, and salt. Bring to a rolling boil.
- Fill the jars with hot brine using a ladle.
- Seal jars with lid. (Optional: vacuum seal the jars with a Food Saver jar attachment.)
- Refrigerate.
- Wait at least 2 weeks and enjoy.
That was easy!
Not that they ever last this long, but they’ll stay fresh for about 5 months in the fridge.
The absence of sealing the jars with a hot water bath keeps the pickles crunchy and fresh, but shortens the shelf life.
The other downside is that they need to be refrigerated, so you need some dedicated fridge space or to give them away if you have a lot!
What is your favorite type of pickle?
]]>[bctt tweet=”Focus on what you CAN eat rather on finding substitutes for what you can’t. #paleo” username=”corkboardblog”]
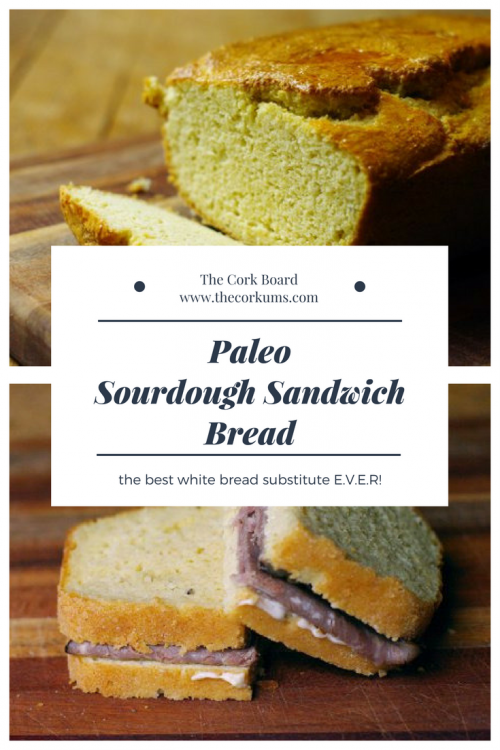
But sometimes you just need a solid bread substitute. In the past, we’ve found that Paleo breads were either too dense or were more like dessert breads rather than sandwich breads.
Then I found this recipe that used cashews and whipped egg whites. It calls for probiotic to “sour” it. What I really wanted was to be able to use my grain-free sourdough starter, so I experimented and am here to report back so you can have awesome, healthy, grain-free, sourdough bread.
What you’ll need:
20 oz. raw cashews
(I get mine through Thrive Market, but then I also found these if you’re an Amazon person.)
1 cup water
1/2 cup active grain-free sourdough starter
4 large eggs, separated
2 TBS. water
1 tsp. baking soda
1/2 tsp. salt (use something unprocessed with all the extra trace minerals still in it).
Real Salt or Pink Himalayan Salt are solid choices
Loaf pan
Butter
Parchment paper
The Night Before
- In a food processor or powerful blender, blend the cashews, water, and starter together until very smooth. Use a rubber scraper if necessary to scrape the sides and incorporate all the cashews.
(We have a Ninja blender). - Transfer to a large glass bowl. Cover and leave in a warm place overnight. The dough needs to be at at least 85 degrees but not more than 110. I either sit mine next to my crockpot (if I’m cooking something) or in my oven with just the oven light on.
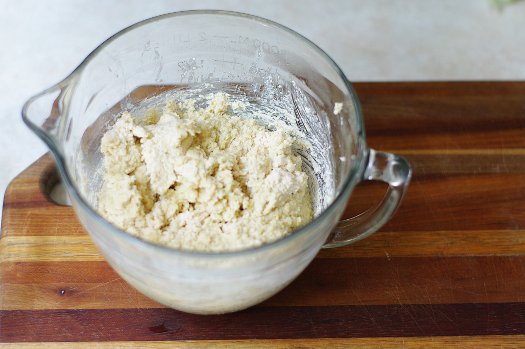
On Baking Day
- Preheat the over to 325 degrees F.
- Grease the loaf pan. Dust with starch. Line with parchment paper. I usually use a piece that lines just the bottom and long sides of the pan with an inch that hangs over on each side. (I still hadn’t trimmed the paper in this picture.)
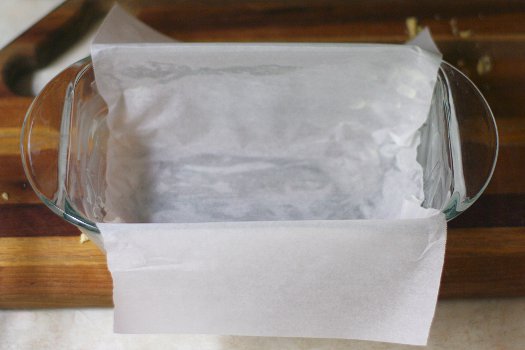
- Beat the yolks with the 2 tablespoons of water. Reserve about a tablespoon in a small bowl for brushing the top of the loaf later.
- Add the yolks, baking soda, and salt to the dough.
- With clean beaters, beat/whisk the egg whites until soft peaks form.
- Gently fold the egg whites into the dough.
- Transfer the dough to the loaf pan.
- Brush gently with the reserved egg yolk mixture. (Parchment still not trimmed. I promise that I did that before I put it in my hot oven and burned my house down ;))
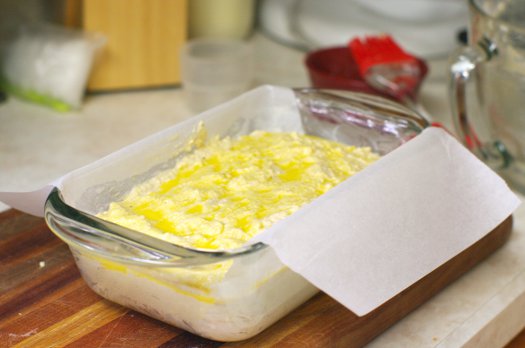
- Bake at 325 for about 50 minutes. The interior of the bread should read at least 200 degrees F.
- If the top needs more browning, turn up the oven to 375 and bake another 5 to 10 minutes.
- Remove from oven and turn onto a cooling rack. Wait at least 10 minutes to cut.
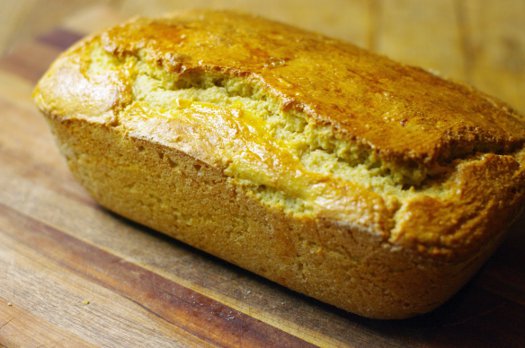
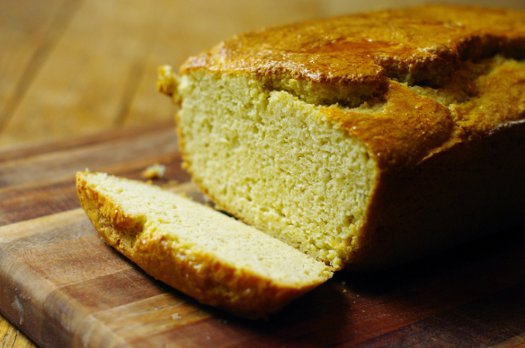
This bread is the closest thing to a white bread substitute that we’ve ever had. It’s not too dense and doesn’t have a strong flavor. It’s perfect for sandwiches, almond butter toast, and even french toast.
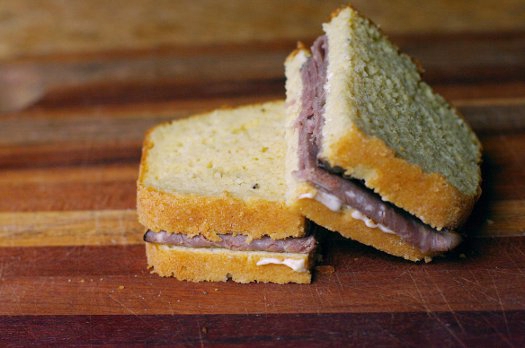
What would you put on a Paleo sandwich?
]]>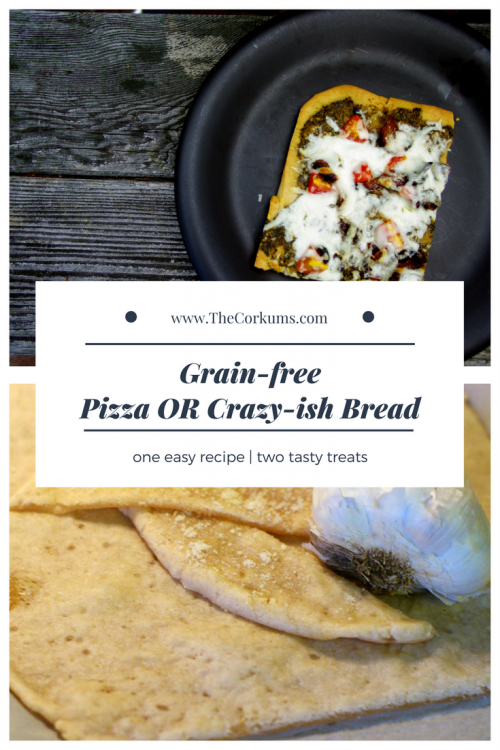
If you subscribe to the theory that bread and cheese are the hardest things on our digestive systems because of the gluten, lactose, and casein, then pizza is absolute worst invention E.V.E.R…except that it’s so much fun to eat!
In my book, there is no acceptable cheese substitute, so we just take a digestive enzyme to break down the lactose and move on. However, after a lot of experimenting and Pinterest-ing, we did find a crust substitute that’s worth making.
Don’t even start about that cauliflower crust thing :/ I love me some roasted cauliflower and even caul-rice, but it was not meant to be crust!
My go-to crust uses this recipe as inspiration.
Ingredients
1 cup tapioca or arrowroot starch/powder/flour (it may be called different things depending on the brand, but it’s all the same)
1 cup cassava flour
1/2 coconut flour
1 tsp Real Salt or some other unrefined salt
1 can full fat coconut milk
1/2 cup coconut oil (use refined if you don’t like the taste/smell of coconut oil)
2 eggs (you can sub this for a gelatin egg if necessary)
1 tsp each of onion and garlic powder
Directions:
- Mix dry ingredients first. Then add wet ingredients. Combine thoroughly.
- Divide dough into 2 balls. This freezes well as dough or after baking so you can mix once and bake twice!
- Roll out a ball of dough between two pieces of parchment paper. No thicker than 1/4″.
- Transfer the dough/parchment sandwich to a baking sheet (I prefer stones) and remove the top layer of parchment.
- Bake at 450 degrees Fahrenheit until desired doneness.
For Pizza:
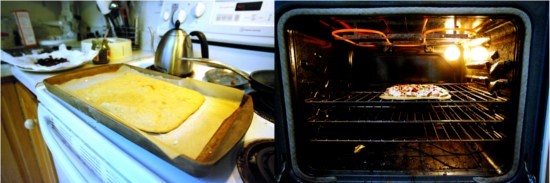
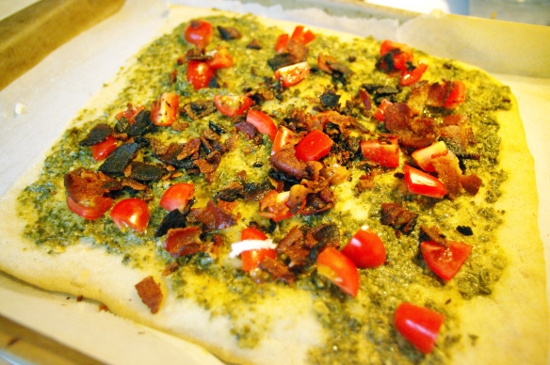
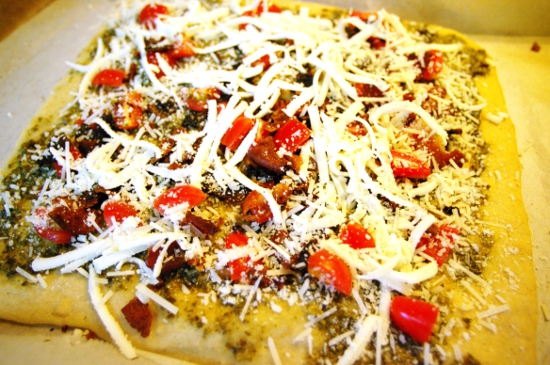
I like crispy crust, so I pre-bake the dough a little longer for pizza so it’s already on the crispy side. Top the crust with your desired toppings. We used pesto in lieu of sauce for this one. If you prefer tomato sauce try a heavily salted tomato paste with fresh herbs instead of canned sauces. The lack of moisture in tomato paste keeps the crust crispier. We’ve also done cheese-less versions which are just as tasty in my opinion but would never pass muster for the cheese-lovers in our family.
For crazy bread:
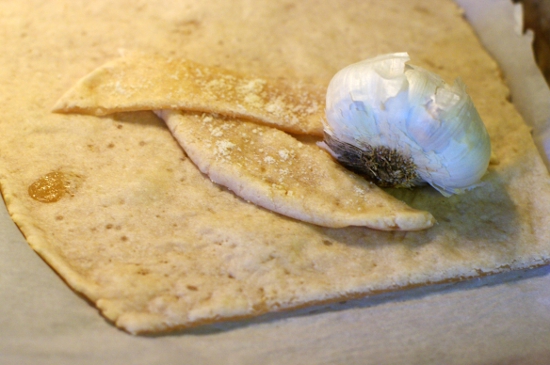
Bread sticks should be soft and chewy in my humble opinion, so we pre-bake the dough for this iteration a little less. Top the bread with grass-fed salted butter, fresh minced garlic, and grated Parmesan cheese. Return to the oven until everything is melty and bubbly. Cut into strips with a pizza cutter and enjoy.
The Sourdough Starter
If you have a typical, wheat starter, you can split a small amount off and start feeding it with cassava. Your sensitivity to wheat/gluten will dictate how many times you want to split it and feed it grain-free before you feel comfortable using it. You can also purchase a gluten-free starter. I’ve started seeing them in higher end grocery stores, or you can order one here. Once it’s established, feed it until you have 1/2 cup plus some to feed for next time.
Ingredients
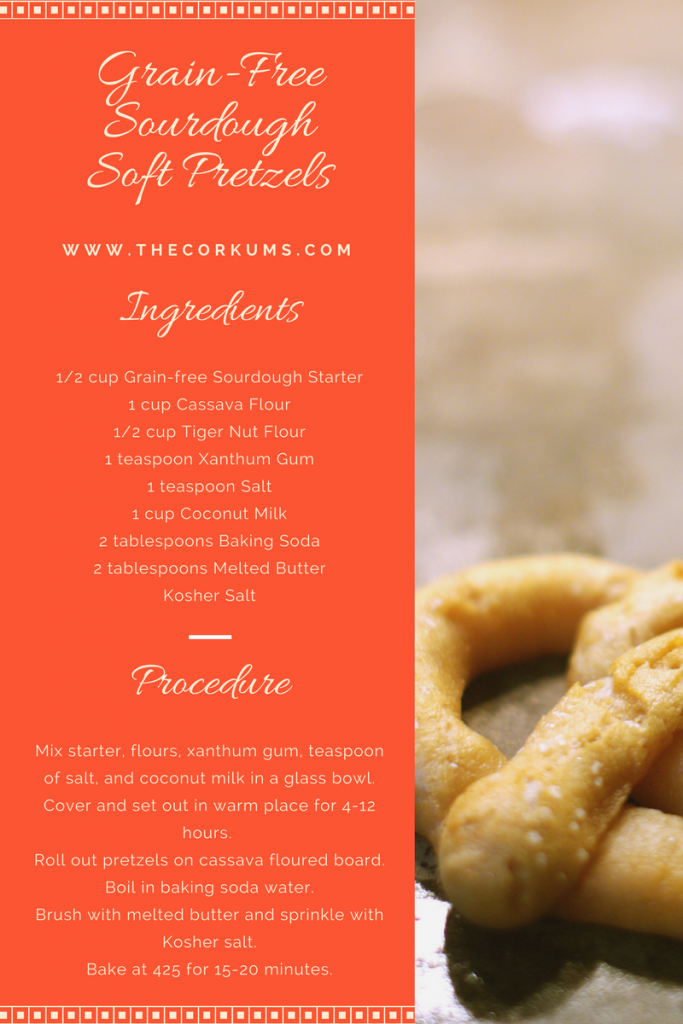
1/2 cup Grain-free Sourdough Starter
1 cup Cassava Flour
1/2 cup Tiger Nut Flour
1 teaspoon Xanthum Gum
1 teaspoon Salt
I suggest Real Salt or a Himalayan Pink Salt for the added mineral benefits.
1 cup Coconut Milk
2 tablespoons baking soda (for water wash)
2 tablespoons melted grass-fed butter
Kosher Salt for sprinkling
Procedure
- Mix starter, flours, xanthum gum, salt, and coconut milk in glass bowl. It will make a stiff dough.
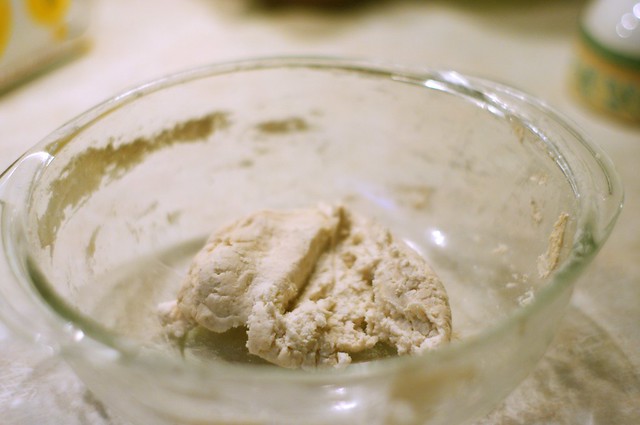
- Cover and set in warm place for 4-12 hours.
- Preheat oven to 425F.
- Roll out pretzels on a cassava-floured board. I made a traditional shape, but feel free to get creative. We used to make our initials when we were kids!
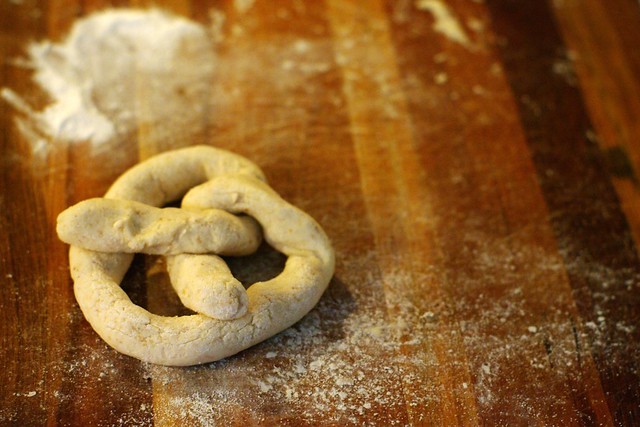
- Bring a large pot of water with the baking soda to a rolling boil. Line a baking sheet with parchment and sprinkled with cassava.
- Use a slotted spatula to gently lower a pretzel or two into the boiling water. Boil for one minute. They should float after about 30 seconds. If the pretzels fall apart, try freezing the formed shapes first for an hour.
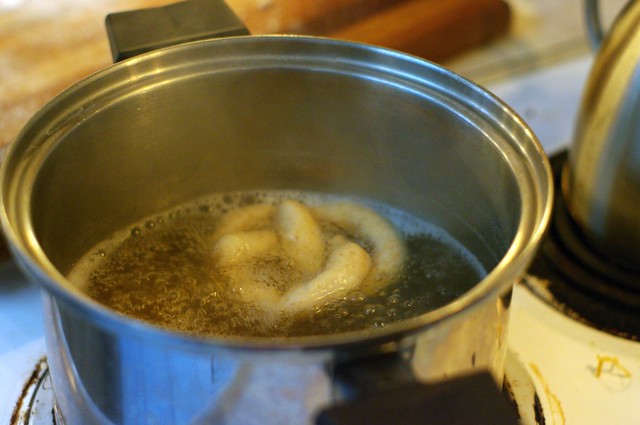
- Lift the pretzel from the water and allow to drain for a couple seconds. Place on baking sheet. Repeat for all pretzels.
- Brush with melted butter and sprinkle with Kosher salt.
- Bake for 15-20 minutes until cooked through and golden brown.
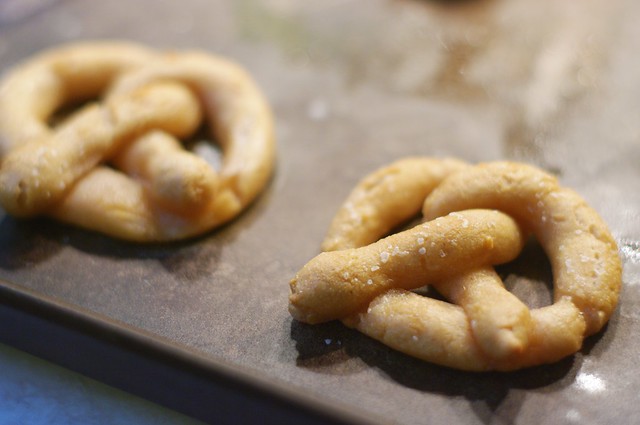
You can also experiment with sweeter pretzels with cinnamon and such. I’m more of a savory gal myself.
Do you have other go-to grain-free sourdough recipes? Please share!
]]>*If you need a primer, type “benefits of sourdough” into your preferred search engine.
Equal parts of flour and water in a mason jar on my counter. To my amazement, it got bubbly and starter-ish looking after just a couple days.
SUCCESS!
Or so, I thought. It seemed no matter what I did, I could not get this starter to make anything rise. I tossed brick after brick of sourdough “bread.” I had almost given up and assumed I might have to cave and buy a starter, when VOILA! After almost 2 years of trial and error, I finally found success. I think I had never gotten my starter (or dough) warm enough. Eighty-ish degrees Fahrenheit (80 F) seems to be the magic threshold. In the winter, I need to keep my starter and rising dough stacked around my slow cooker which I fill with water and set to warm. I had tried putting the dough in the warm crock once, but that gets too hot.
Here are some other tips and resources I’ve learned during my sourdough journey.
- If you want to get started (and don’t live close enough to me to get a jar of my starter), check out Cultures for Health.
- Starter is pretty forgiving and resilient despite the hype. I leave mine in the refrigerator when I’m not actively baking. It has gone up to months without a feeding, and I’ve been able to revive it. Ideally you should probably feed cold starter every 1-2 weeks.
- Gluten-free starters (I feed mine with rice flour) are just as much fun. I now keep one of each in my fridge.
**8/10/2017 UPDATE** I converted my gluten-free starter to grain-free by feeding it with cassava flour. - I can get mine active enough with just one feeding out of the fridge as long as it’s warm enough. This is great because it creates less extra starter.
- In case you end up with lots of extra or discarded starter, find a go-to recipe. There are recipes for discarded, gluten-free starter, too!
Tried and True Sourdough Recipes
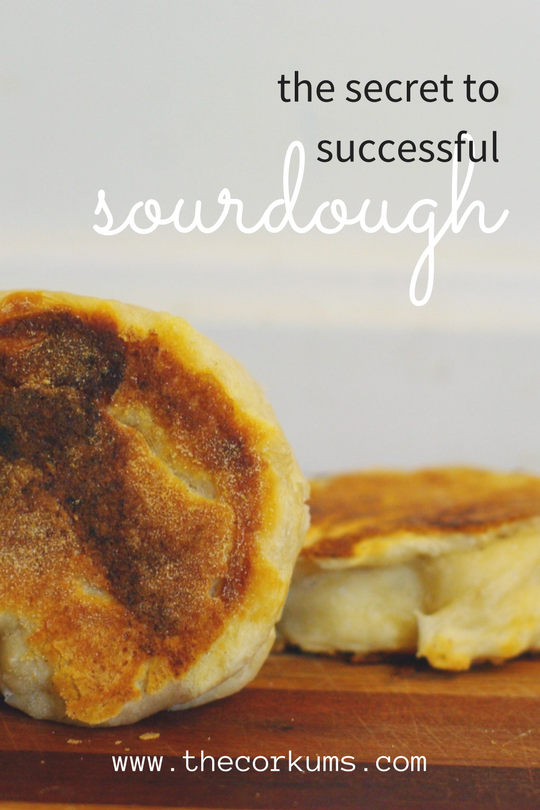
English Muffins–I make these the most often. I’ve used almond milk and 1% milk with no issues. I leave them out overnight and skip the refrigeration part. I’ve also found that letting them re-rise after mixing in the baking soda water gives the fluffiest muffins. I can squeeze out 10 if I let the dough do this second, short rise.
No-Knead Bread– This is my favorite no-knead bread. I’ve subbed a 4ish ounces of sprouted whole wheat or spelt flour with success. This recipe makes a larger loaf, or I’ve successfully split it for 2 smaller ones. I’m also experimenting with parbaking (just doing the first 30 minutes covered) and freezing so we can have less sitting out and another fresh loaf without the full process.
Grain-free Bread– This is Ty’s favorite! I’ve subbed flax meal for the psyllium husk and hazelnut flour for the almond flour. The hazelnut flour definitely changes the flavor more towards a dessert bread. We make paninis and even french toast using this bread!
Every other sourdough recipe I’ve tried has also come from the Cultures for Health recipe blog. We’ve tried the basic sourdough loaf (I do a half recipe at a time), gluten-free snicker-doodles, french baguettes, muffins, and we always turn our discarded starter into crepes (for the gluten free starter) or pancakes.
]]>For all the things that are challenging about setting up our youngest for success, he's a great eater. We moved to him to a mostly grain-free, Paleo-ish diet a couple years ago for reasons that could be an entirely different post. Let's suffice it to say that I think this is a generally healthy way to eat, and Patrick and I tend more toward this way of eating. While most folks think they could never give up grains, I prefer to focus on what we can eat--grass-fed meat (including bacon), veggies, seeds, bacon, fruits, nuts, eggs, and, almost forgot, bacon. Clearly you're catching on to why you should eat this way...bacon (the free-range uncured kind whenever possible).
With all the chaos of the last four years, the first thing to go was me cooking family meals. I moved to supplying the basics in the cupboard and fridge and fixing food for mostly just Ty and me. The rest were kind of on their own. Since Ty is only allowed to eat basically what I eat, it works. I'm really not big on recipes, so this is not a step-by-step post on how to recreate what's in the photos. Think of them more like inspiration.
Breakfast*
*We're not really a family that distinguishes "breakfast" food from any other food. We eat leftovers for breakfast and pancakes for dinner on a regular basis.
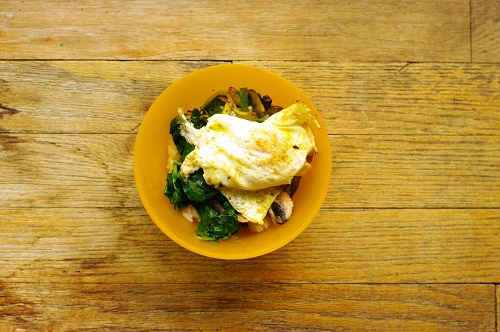
This particular breakast has eggs, so I guess it's more breakfast-y than some things we find in our bowls in the morning I started by stir frying baby spinach, onions, and mushrooms with fresh garlic in a healthy scoop of grass-fed butter. That went on top of some leftover Chinese food rice (clearly we're not religiously Paleo) and was topped with a fried egg. As I'm looking at the picture, it screaming, "I need fresh tomatoes." That would add some color and temperature contrast. Yum.
Lunch
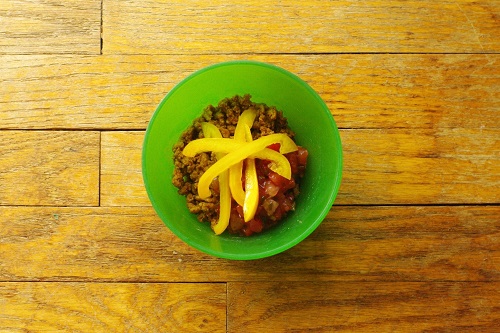
When I do "cook" for the family, it's often just a large batch of meat that people do what they want with. Taco meat is a staple around here. On this particular day, breakfast was taco meat served hot and topped with salsa and peppers. If you can tolerate dairy, a dollop of sour cream or some shredded cheese would work too. I like the hot/cold contrast. Sometimes this bowl also gets fresh spinach mixed in or I serve the hot meat on stop of a BBQ Ranch chopped salad.
Dinner
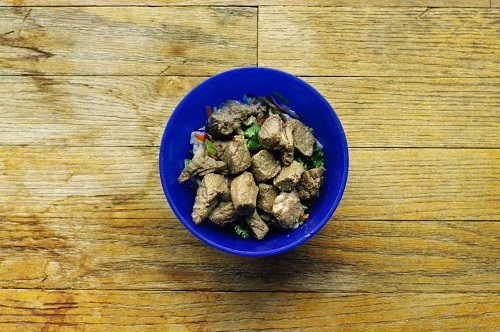
Chopped salads are probably my favorite foundation for a bowl of leftovers. I really love the crunch. This is an Asian chopped salad topped with leftover Asian-inspired steak. I love to marinate my meat in hydrogen peroxide. It sounds weird, but makes for really tender meat. Seeds or nuts would've been fun in this bowl as an addition.
So now you know what a typical day looks like for us grain-free folks. Not bad really. Sadly this particular day didn't include bacon, but rest assured we eat a lot of bacon.
Do you ever throw together a meal in a bowl? What do yours include?

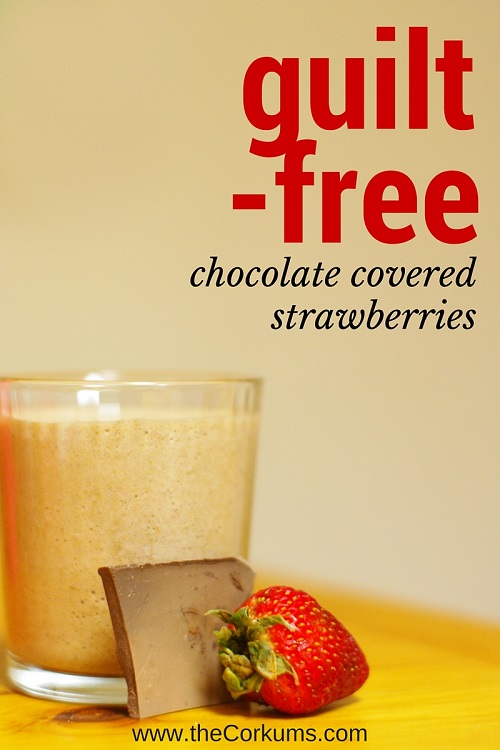
Instead, I’ve been throwing the following recipe in a blender for a treat that’s still tasty like chocolate-covered strawberries, has more wellness benefits, and takes a lot less time.
[bctt tweet=”Ingredients for Chocolate Strawberry Shake that has added #wellness benefits”]
Ingredients for Chocolate Strawberry Shake
3 to 5 strawberries depending on the size
2 scoops of chocolate protein powder*
1 scoop of greens* or a handful of dehydrated kale
3 ice cubes (or freeze your strawberries beforehand)
1 1/2 cups of liquid (I used plain water kefir, but you could use milk kefir or non-dairy milk)
1 teaspoon of maca
The end result is frothy and satisfying. Plus, unlike actual chocolate-covered strawberries, it has protein, extra vitamins, and the power of maca.
Benefits if you use the same chocolate and greens powder as me
- Provides a convenient low-fat, low-calorie, high-protein, high-fiber, lean alternative for individuals trying to lose fat or maintain a lean body composition through calorie reduction and exercise.
- Helps control the release of the stress hormone cortisol, which is associated with the accumulation
of fat, particularly around the stomach, hips, and thighs. - Helps control stress-induced appetite, overeating, and carbohydrate cravings.
- Provides essential amino acids to help prevent loss of muscle mass and muscle tone.
- Helps support blood sugar levels already in the normal range.
- Enhances energy levels while helping to alleviate fatigue commonly associated with dieting and exercise.
- Helps fight hunger cravings.
- Can help supplement your exercise efforts to help you control stress, maintain muscle mass, and maintain the shape you worked so hard for.
- Drink to combat fatigue from early morning workouts.
- Drink for breakfast to take the stress out of cooking a healthy, balanced meal.
- Can be used to replace meals with at least one well-balanced nutritious meal daily.
- Supports increased feelings of satiety.
- Contains ashwagandha to help manage appetite.
- Provides the body with essential nutrients.*
- Supports immune health.+
- Supports digestive health.+
- Supports weight management.+
+These statements have not been evaluated by the Food and Drug Administration. This product is not intended to diagnose, treat, cure, or prevent any disease.
*If you want to find out where to get our favorite non-gritty chocolate protein powder and powdered greens, send me a message.

What is your favorite shake recipe?
]]>I LOVE chai. Unfortunately, most chai is black tea based.
I recently came up with a recipe for herbal chai that makes me happy so I though I’d share it with you.
- Get a pot of organic rooibos going. (My favorite tea distributor is Joy’s Teaspoon.) Just follow the directions on the package. Rooibos is a pretty forgiving tisane. Obviously using loose is better than bagged.
- Now the fun part. Prepare your mug with the spices. I use essential oils to flavor mine because they are cost effective, natural, and have added benefits. I recommend a finger swipe of cardamom, a finger swipe of cassia or cinnamon, and a full drop of ginger. However, you can adjust this flavor balance to make your taste buds happy!
- Pour your steamy rooibos into your mug, inhale deeply the delicious aromas, sip, and enjoy.
We’ve chosen a specific brand of essential oils because of the company’s commitment to safety, sustainability, quality, and support. We believe life (including essential oils) is best done in community and this company has a similar mindset. Unfortunately, to protect myself from scrutiny from the FDA, I’ve chosen to not disclose the brand on my website. It’s crazy world we live in! If you want to learn more about who we chose and why, send me a message here. You can also sign up for my newsletter where I send out wellness tips, event invites, and ways to get FREE oils.
]]>